


Login
Get Instant Pricing On 23,000+ Aircraft

>
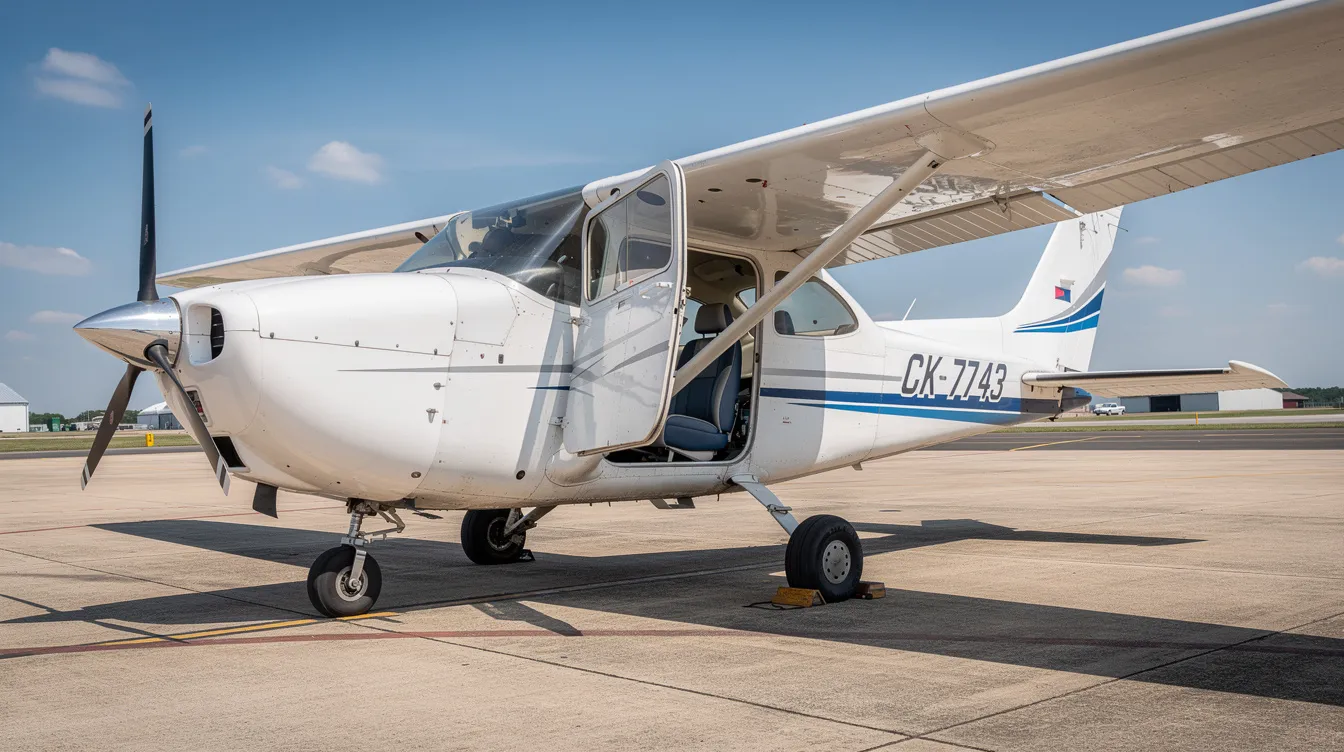
The cockpit of a Cessna 172 is a training-focused flight deck built around the classic six-pack of primary flight instruments, basic engine controls, dual yoke controls, and a simple avionics stack that teaches the core flying skills pilots use in many aircraft afterward. For student pilots, flight simulator users, aviation enthusiasts, travelers curious about how small-aircraft flight decks work, and even private jet passengers looking for context, it is one of the clearest introductions to fundamental cockpit operation.
The cockpit layout accommodates both a pilot and co-pilot, with dual yokes and rudder pedals for steering and coordination. In this guide, you’ll see how the Cessna 172 panel is organized, how its flight instruments, engine controls, fuel management, electrical and avionics systems, autopilot modes, and cockpit ergonomics work, and why understanding this layout sharpens instrument scanning, supports simulator training, and makes more complex aircraft and private jet cockpit operations easier to follow.
The Cessna 172 cockpit features a classic six-pack instrument layout with six primary instruments arranged in two rows: airspeed indicator, attitude indicator, and altimeter on top; turn coordinator, heading indicator, and vertical speed indicator on the bottom.
This guide focuses on the traditional steam gauge panel, though newer models like the 172S use the Garmin G1000 NXi glass cockpit to display the same core data digitally.
Fuel controls, power management, electrical switches, and avionics are placed for easy reach and follow a consistent layout across most Cessna 172 variants.
The cockpit emphasizes logical organization for primary flight information and engine controls, with controls such as a throttle lever for engine power, mixture control to adjust fuel-to-air ratio, flap settings at 0°, 10°, 20°, or 30°, a fuel selector switch for tank management, trim controls located to the right of the pilot's seat, and a parking brake lever between the pilot's knees.
Visibility in the Cessna 172 is enhanced by a high-mounted wing and large windows, aiding situational awareness.
Knowing the instrument panel layout helps student pilots, simulator users, and aviation enthusiasts build skills that transfer to more complex aircraft, including private jets.
While Jettly specializes in private jet charter, understanding general aviation cockpits like the Cessna 172 adds useful context for anyone interested in how pilots manage flight decks and avionics devices.
The cockpit of a Cessna 172 is a simple, training-focused flight deck built around the classic six-pack instrument layout, basic engine controls, and a consistent panel that teaches core flying skills. Modern 172S models present the same essential information on digital screens through the Garmin G1000 NXi glass flight deck. Some cockpits may also include Aspen Avionics displays as aftermarket upgrades, supporting both traditional and electronic displays.
For student pilots, flight simulator users, aviation enthusiasts, and travelers who want to understand how light-aircraft cockpit skills connect to private flying on a wide range of private charter aircraft, this makes the 172 one of the clearest aircraft to study. For a deeper look at the airframe itself, see this comprehensive overview of the Cessna 172S Skyhawk.
The Cessna 172 Skyhawk, the world’s most produced aircraft, is a four-seat, single-engine, high-wing airplane introduced in 1955. It has logged more flight hours than any other aircraft in history and remains the primary trainer at flight schools worldwide.
The cockpit design has evolved since 1955; early variants used an irregular "shotgun" layout, but starting with the 172M in 1976, Cessna standardized the panel for the six-pack arrangement still used today. The cockpit supports both VFR training and IFR foundations.
Pilots continuously scan outside for traffic, primary flight instruments, engine gauges, and navigation displays. That foundation helps readers make sense of how pilots manage more complex aircraft and gives private jet travelers better context for the flying behind trips booked through Jettly and routed via tools like an airport locator for private flights.
Think of the instrument panel as three zones arranged left to right:
Left side: light switches, electrical switches, and sometimes a fuel pump switch
Center: the six-pack cluster of flight instruments, directly in front of the pilot
Right of center: engine gauges (tachometer, oil pressure, fuel quantity)
Lower center/right: avionics stack, radios, transponder, and circuit breakers
The pilot's and copilot's control yokes mount through the lower panel and can partly obscure some switches until pushed forward. The Cessna 172 has a parking brake lever between the pilot's knees, just below the panel. Many training 172s have checklists and POHs tucked beside the panel, but the core setup remains consistent across most model years and variants.
This panel layout works as a guided tour: left to right, top to bottom, everything a pilot needs for flying is within arm's reach.
The six pack refers to the six primary instruments grouped in a standard two-by-three grid directly in front of the pilot. Together, they tell a pilot everything about the plane's state in the air. Flight instruments are arranged in a standard pattern for rapid scanning.
Airspeed indicator: Speed through the air in knots; indicated airspeed
Attitude indicator: Pitch and bank relative to the horizon, using a vacuum-driven gyroscopic system
Altimeter: Altitude above sea level, requiring calibration to local air pressure
Turn coordinator: Rate and direction of turn, coordination
Heading indicator / directional gyro: Magnetic heading on a 360° card
Vertical speed indicator: Climb or descent rate in feet per minute
Students learn a "hub-and-spoke" scan: start at the attitude indicator in the center, then check each surrounding instrument in sequence. Pilots in the Cessna 172 continuously scan outside for traffic, primary flight instruments, engine gauges, and navigation displays. This scan technique builds habits that transfer directly to glass cockpit PFDs, which display the same data in digital format. Pilots considering flight training costs should know that mastering this basic scan is one of the first skills taught.
The airspeed indicator measures speed in knots indicated airspeed (KIAS) using inputs from the pitot-static system. Its face displays color-coded arcs: a white arc from about 40 to 85 KIAS for the flaps-operating range, a green arc up to 129 KIAS for normal operations, a yellow caution arc, and a red line at roughly 163 KIAS marking Vne (never exceed speed).
The attitude indicator uses gyroscopes to show aircraft orientation, with a blue-over-brown display representing sky and ground. The Cessna 172 uses a vacuum-driven attitude indicator system in most classic panels; a vacuum pump spins the gyro, so a pump failure takes this instrument offline. It serves as the "hub" of the instrument scan because pitch and bank information anchors everything else.
The altimeter shows altitude based on local air pressure settings. A pilot turns the barometric setting knob to dial in the current altimeter setting from ATIS or ATC, and the needles indicate height above sea level. Without the correct pressure setting, the reading drifts.
Example: On a climb after takeoff, a student cross-checks airspeed (targeting about 74 KIAS for best rate of climb), confirms a nose-up pitch on the attitude indicator, and watches the altimeter wind upward to verify the aircraft is actually gaining altitude.
The turn coordinator displays a miniature airplane symbol that tilts to show rate and direction of turn. Below it, the inclinometer (a ball in a curved tube) shows whether the aircraft is slipping or skidding. "Step on the ball" is the standard correction: if the ball slides left, press the left rudder pedal to create balance between turning forces and keep the aircraft coordinated.
The heading indicator (also called the directional gyro) shows the aircraft's heading on a 360° compass card. Because it runs on a gyro, it drifts over time and must be periodically synchronized with the magnetic compass. In IFR training, the heading indicator becomes essential; the pilot can set a selected heading bug with a small knob on the instrument's face. That bug pairs with basic autopilot heading modes on equipped aircraft.
The terms heading indicator and directional gyro are used interchangeably in the Cessna 172 context.
The vertical speed indicator rounds out the six pack by showing rate of climb or descent in hundreds of feet per minute. It uses the static system and a calibrated leak; because of that leak, the VSI lags a few seconds behind actual changes in pitch. Pilots cross-check it with the altimeter and attitude indicator rather than relying on it alone.
To the right of the six pack sit the engine instruments:
Tachometer: displays the engine's revolutions per minute (RPM)
Oil pressure and oil temperature gauges: monitor engine health
Fuel quantity gauges: one per wing tank, showing how much fuel remains
EGT/CHT: exhaust gas temperature and cylinder head temperature, present on some models
Training example: During an approach, a student sets a target descent rate of about -500 fpm on the VSI while watching RPM to detect if airspeed is building too fast. If RPM climbs above the target, the student reduces throttle to maintain a stable descent without shock-cooling the engine.
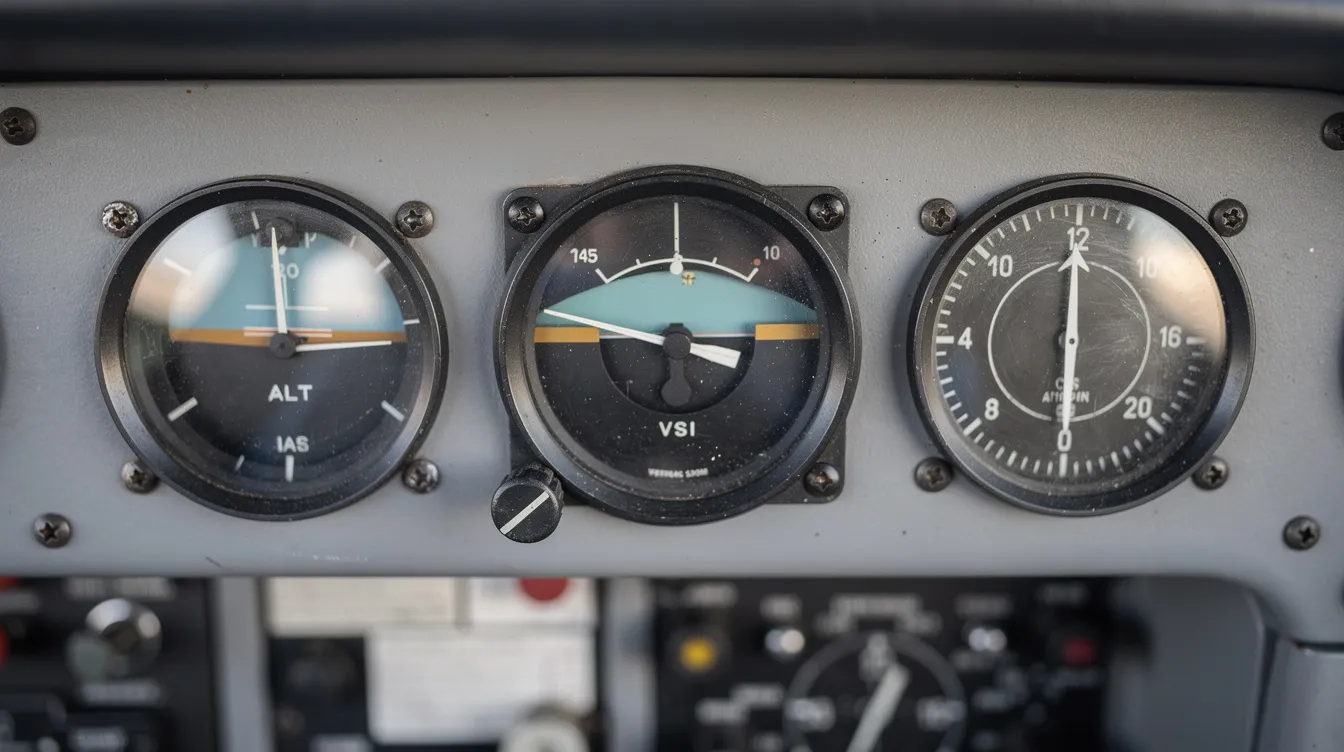
The Cessna 172 features a fuel selector switch for tank management, located near the pilot's knees on the cabin floor tunnel between the front seats. Typical positions are LEFT, RIGHT, BOTH, and OFF.
Standard training practice: use BOTH for takeoff, climb, and landing. During cruise, a pilot may select LEFT or RIGHT to balance fuel flow between wing tanks. If the plane flies with wings not perfectly level on BOTH, one tank supplies more fuel than the other, creating a weight imbalance. The 172's fuel capacity in standard tanks is about 38 gallons usable; optional long-range tanks increase that to roughly 48 gallons, and the same fuel-planning mindset carries over when evaluating how much a private jet costs to own or charter.
A red fuel shutoff control sits under or near the panel (location varies by model). It cuts fuel flow to the engine for emergency shutdown or engine-compartment fire scenarios.
Pilots visually check fuel levels during preflight and confirm the fuel selector position during the pre-takeoff checklist. Simulator software models this behavior; forgetting to set the selector to BOTH before takeoff in a simulator mirrors a real-world mistake that has caused engine failures on actual flights.
Power, configuration, and trim controls sit within easy reach on the lower center panel.
The Cessna 172 has a throttle lever for engine power, typically a black push-pull knob. Pushing it in increases RPM and power; pulling it out reduces power. During climb, students push the throttle full forward. In cruise, they adjust to a target RPM, just as business travelers later learn to adjust their options between leading providers like NetJets and other private aviation leaders.
The red mixture control adjusts the fuel-to-air ratio. Full rich for takeoff and climb at lower elevations; leaned during cruise to prevent spark plug fouling and optimize fuel burn. At higher density altitudes, leaning becomes essential to maintain power, just as understanding performance limits is essential when comparing the best private jet charter companies and the aircraft they offer.
Flaps can be set to 0°, 10°, 20°, or 30°. The flap lever (or switch, depending on variant) sits near the pilot's right hand. Pilots extend flaps incrementally: 10° for a normal approach, adding more as speed decreases and the runway environment is in sight, whether they’re flying a trainer like the 172 or one of the many operators listed in a guide to charter airlines and private flights.
Trim controls are located to the right of the pilot's seat. The pitch trim wheel lets a pilot relieve control pressure for hands-off straight-and-level flight, stabilized climbs, or controlled descents. Students learn to adjust pitch trim early in training because fighting yoke pressure for an entire flight plan is tiring and distracting, much like learning to balance costs and flexibility when choosing between shared charter flights vs. full charters.
The Cessna 172 has a parking brake lever between the pilot's knees, just below the instrument panel, allowing the pilot to secure the aircraft on the ground without continuous rudder pedal pressure—a small detail that contrasts with the cabin-focused experience when you buy a seat on a private jet instead of flying yourself.
The Cessna 172's electrical system runs through a row of switches and circuit breakers below or behind the yoke.
The master switch is a split-rocker design controlling the battery and alternator. The alternator half charges the battery in flight and powers the electrical bus. Turning the avionics master on separately protects radios from power surges during engine start.
Key electrical switches and aircraft lights controls include:
Pitot heat (prevents ice blockage in the pitot tube)
Beacon and navigation lights (required for night ops)
Strobe lights (high-visibility anti-collision)
Landing lights and taxi lights (for runway and taxiway illumination)
Panel lighting rheostat (dims instruments for night flying to preserve the pilot's night vision)
Circuit breakers are small pop-out units below the panel. Each protects a specific device or system. Standard procedure: if a breaker pops, reset it once. If it pops again, leave it out and note it for maintenance. These breakers protect everything from electricity flowing to radios to individual instrument lights, mirroring the safety-first mindset you should apply when exploring easy ways to get a seat on a private jet.
The avionics stack is a vertical column of communication and navigation radios mounted in the center or right side of the panel, and the way pilots use it in everyday operations connects directly to how affordable private jet charter flights are planned and managed behind the scenes.
COM radios handle ATC communication and CTAF/UNICOM calls. Most setups have active and standby frequency windows with a flip-flop button to swap between them. Pilots tune the next frequency into standby before switching.
The Cessna 172 has two navigation receivers: NAV1 and NAV2. These tune VOR and ILS facilities, feeding course deviation indicators (CDIs) on the panel. Cessna 172 models may include the Garmin GTN 650 GPS as a combined COM/NAV/GPS unit in upgraded panels, while frequent charter flyers might upgrade their travel strategy by choosing a NetJets alternative like Jettly for on-demand or membership-based flying.
The automatic direction finder (ADF) appears in older or IFR-equipped 172s. It tunes NDB frequencies via a knob and shows relative bearing on a gauge. Many NDB stations are being decommissioned, so newer panels often omit the ADF as GPS and modern avionics in private plane models from leading manufacturers take over most navigation duties.
The transponder broadcasts a four-digit code (1200 for VFR in the U.S.) and reports altitude to ATC radar. Mode A/C or Mode S operation depends on the model. The IDENT function highlights the aircraft on a controller's screen when requested, whether the flight is a traditional full charter or arranged as crowdsourced private jet flights with shared seats.
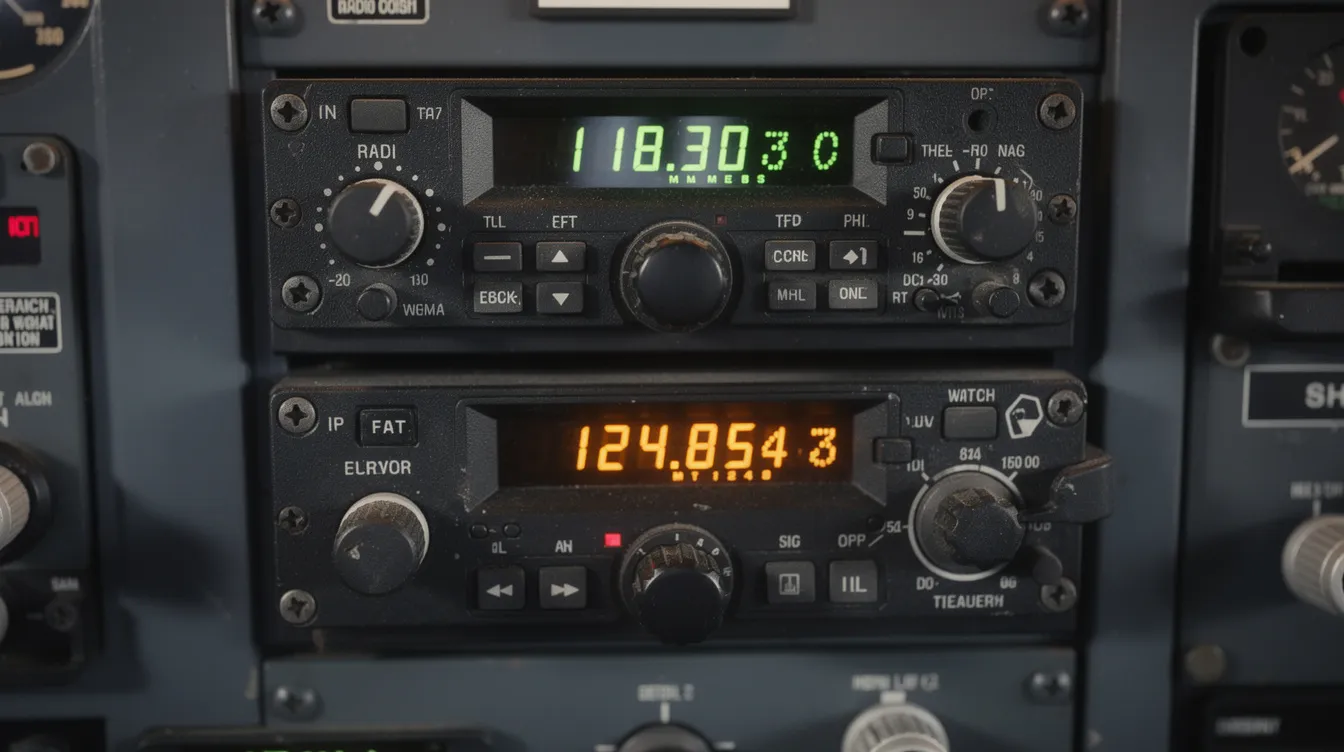
Not every Cessna 172 has an autopilot. Many IFR-equipped or newer aircraft feature a basic two-axis system. The autopilot in the Cessna 172 can maintain altitude and heading, with modes that reference the heading indicator and vertical speed indicator.
Common lateral modes:
ROL: holds wings level
HDG: tracks a selected heading set with the heading bug on the directional gyro
NAV: follows a VOR, GPS, or localizer course
Common vertical modes:
VS: holds a target vertical speed
ALT: holds the current altitude
Pilots remain responsible for power settings, airspeed, and monitoring even with the autopilot engaged. A common IFR training exercise: set HDG mode to fly a runway heading after takeoff, then switch to NAV mode to track a course inbound to a VOR. Retrofit autopilots like the Garmin GFC 500 (base STC price around $11,995 plus installation) are popular upgrades for other aircraft in the training fleet, just as tools like a jet card flight cost estimator are upgrades on the budgeting side of private flying.
The same core concepts in the Cessna 172—attitude, airspeed, heading, navigation, and vertical profile—appear in every business jet and turboprop cockpit. Many pilots who later fly aircraft available through Jettly's platform for private jet memberships built their fundamentals in a 172. Glass cockpit PFDs and MFDs in light jets mirror the six-pack data, just with more automation and data integration.
For passengers using Jettly's private jet charter services, basic cockpit familiarity makes pre-flight briefings and route discussions with the crew more engaging, particularly for frequent flyers considering structured options like jet card programs. And for readers curious about stepping from training aircraft into faster, more capable jets, Jettly's private jet charter cost estimator and on-demand charter options make that transition accessible.
Group the instruments by row. Top row, left to right: airspeed indicator, attitude indicator, altimeter. Bottom row: turn coordinator, heading indicator, vertical speed indicator. Practice verbal callouts during ground study and repeat them during pre-flight cockpit checks. Most students have the layout memorized within a few sessions.
A G1000-equipped 172 replaces most round dials with two color displays (PFD and MFD). The PFD shows airspeed, altitude, attitude, heading, and vertical speed as digital tapes and a synthetic horizon. The data is identical to the six pack; only the presentation changes.
The general layout is consistent, but positions of light switches, circuit breakers, and some engine gauges shift between older N-models, P-models, and newer S/SP variants. Always review the specific aircraft's POH before flying an unfamiliar model.
Modern simulator software models the Cessna 172 panel closely. Some home cockpit builders and educational mockups start from a CAD panel model to match switch and instrument placement more accurately. Users can learn panel layout, radio tuning, and autopilot modes. Real-world nuances like control forces, vibration, ambient airflow, and seat-of-the-pants feel still require actual flight time to develop, but a simulator builds useful muscle memory for instrument scanning and procedures—and can even help future charter passengers imagine how systems support comforts like in-flight catering for private jets.
Basic familiarity with how pilots manage airspeed, altitude, and navigation in a 172 carries into every cockpit. It makes charter briefings, route decisions, and conversations with flight crews on private jets booked through platforms like Jettly more meaningful, especially if you’ve already explored a guide to charter airlines and private flights. You don't need a license to appreciate what's happening up front.
Mastering the cockpit of a Cessna 172, from the six pack and engine gauges to fuel controls, electrical switches, and the avionics stack, gives pilots a foundation that applies to both VFR and IFR flying. Confidence in this cockpit becomes the springboard to more advanced aircraft and complex airspace. The same principles hold in larger business jets, even when their panels are fully glass-based.
Ready to experience more advanced cockpits as a passenger? Explore private jet charter options and instant pricing at https://www.jettly.com.
Share this post:
Jay Franco Serevilla
Aug 9, 2026
|
5
min read
Discover tips and trends in the industry.

5
min read
Cessna 185 Takeoff Distance: Performance, Variables, and Real-World Planning
The Cessna 185 Skywagon is a versatile aircraft known for its impressive takeoff capabilities, requiring approximately 1,000 to 1,430 feet to clear a 50-foot obstacle under ideal conditions. Factors such as weight, density altitude, and runway surface can significantly affect these distances, making careful planning essential for safe operations. Understanding these variables is crucial for pilots and charter clients navigating remote airstrips.
Read More
5
min read
Private Plane India: How to Fly Private with Jettly
Flying private in India has become increasingly accessible for both business and leisure travelers. This guide provides insights on chartering private planes, including costs, benefits, and popular routes, making it easier to decide if private aviation suits your travel needs. With Jettly's platform, travelers can enjoy flexibility, luxury, and time savings while exploring over 20,000 aircraft options worldwide.
Read MoreStay updated with our latest insights and tips to elevate your journey with us.
MEMBERSHIPS AND ASSOCIATIONS



Disclaimer: Jettly operates as a charter broker, offering access to a global digital jet charter marketplace. Jettly is not a direct air carrier and does not own or operate aircraft. All advertised flights are conducted by third-party air carriers that are fully licensed and hold the appropriate Part 135 or Part 121 certifications issued by the Federal Aviation Administration (FAA) or equivalent regulatory authorities under U.S. or foreign law. Jettly complies fully with the U.S. Department of Transportation's Part 295 and Part 298 Charter Broker regulations. Jettly does not carry additional liability insurance. Passengers are covered by aircraft operator insurance. TICO: 50023770


